What does it mean to winterize a house in the Pacific Northwest?
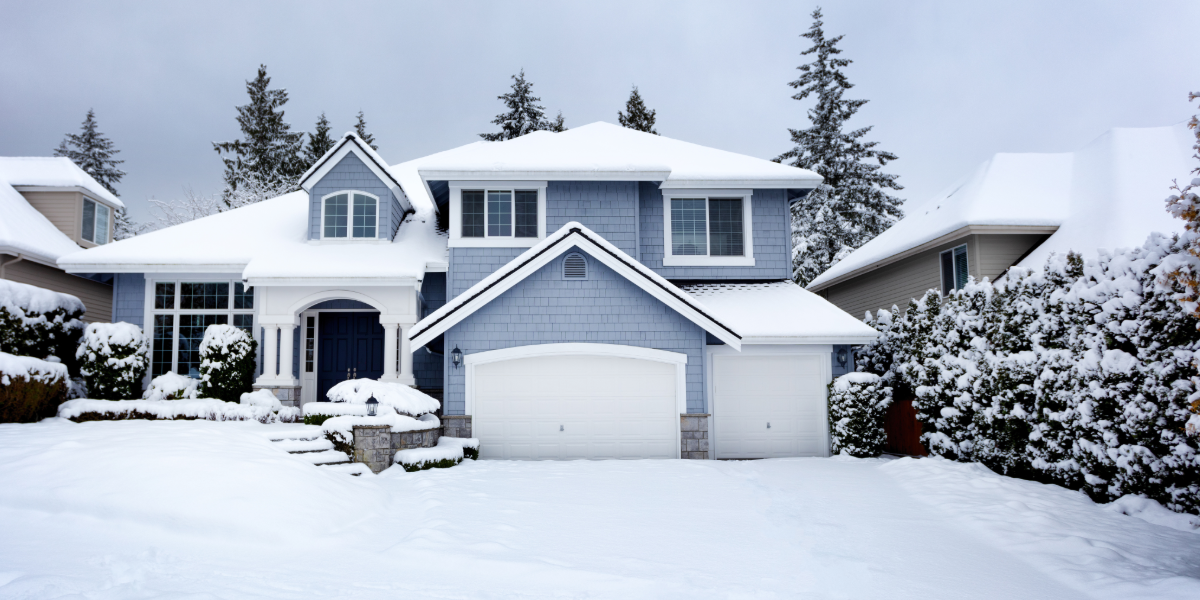
Winterizing a house in Washington means protecting it from months of rain, saturated soil, wind, and moss, plus the occasional hard freeze. Unlike the Midwest or Northeast, where the work is about snow load and deep cold, the Puget Sound checklist is about keeping water out of the structure and keeping the home functional when the power goes out.
Treat the list below as your fall home maintenance checklist. It is in the order you should do it, starting outside while the weather still allows.
Phase 1: drainage and the ground (steps 1 to 5)
Western Washington gets most of its annual rainfall between October and April. Saturated soil against a foundation is where the expensive problems begin.
1. Clean the gutters and check the downspouts
Do this after the first leaf drop, and again in late November. A gutter full of maple leaves overflows against the fascia and dumps water at the foundation. Confirm every downspout actually carries water away, either into a storm drain, a splash block, or an extension that runs at least four feet from the house.
2. Walk the perimeter during a heavy rain
Not after. During. Watch where water pools, where it runs toward the house instead of away, and where it comes off the roof in a sheet because a gutter is missing or bent. Twenty minutes in the rain shows you more than any dry-day inspection.
3. Check the grading
Soil should slope away from the foundation. Beds that have built up over years of mulch, or a patio that settled toward the house, send water into the crawlspace or basement. Regrade with soil, not gravel, and keep mulch a few inches below the siding line.
4. Clear the yard drains and catch basins
If your property has a French drain, a curtain drain, or a catch basin, find the cleanout and make sure water flows through it. These systems silt up, and a drain that worked in 2019 may be a decorative grate in 2026.
5. Look in the crawlspace
Most Puget Sound homes built before 2000 have one. Open the access, bring a flashlight, and look for standing water, a damp vapor barrier, sagging insulation, or the smell of mildew. Moisture in the crawlspace is the most common inspection finding in this region and the one most often ignored until it becomes a structural repair.
Phase 2: the roof (steps 6 to 9)
Moss is a Western Washington roof problem that most of the country has never dealt with. It lifts shingles, holds water against the roof deck, and shortens a roof's life by years.
6. Treat or remove moss
Early fall, while it is still dry enough to work. Apply a moss treatment along the ridge and let the rain carry it down, or have a roofer remove established growth. Do not pressure wash a composition roof. It strips the granules and voids most warranties.
7. Check flashing, vents, and the chimney
Where things penetrate the roof is where leaks start. Look at the flashing around vent pipes, skylights, and the chimney for gaps, rust, or lifted sealant. A tube of roofing sealant in September prevents a ceiling stain in January.
8. Trim branches over the roof
Anything overhanging the roofline drops needles and leaves into gutters all winter and becomes a projectile in a windstorm. Cut back to at least six feet of clearance. Anything larger than you can handle from the ground is a job for an arborist, and September is when they still have openings.
9. Know the age of your roof
A composition roof in this climate lasts 20 to 25 years, less under trees. If yours is past 20, have it looked at before the rain starts rather than after the first leak. Our guide to questions to ask when touring a house covers how to read a roof's condition, and the same checks apply to the one you already own.
Phase 3: the exterior and the wind (steps 10 to 13)
November through January brings the windstorms. Trees come down, power goes out, and anything loose in the yard ends up somewhere else.
10. Inspect siding and caulk
Walk the exterior and look for cracked caulk around windows and doors, gaps where siding meets trim, and any wood that gives when you press it. Water finds every one of these. Caulk and paint while it is still dry.
11. Check windows and doors for drafts
Hold a hand near the frames on a windy day. Replace weatherstripping that has flattened, and add door sweeps where daylight shows under the door. This is the cheapest energy improvement available and it takes an afternoon.
12. Secure or store what the wind will take
Patio furniture, umbrellas, trampolines, and grill covers. A 50 mile per hour gust through the Cascade gaps moves all of it. Anchor what stays out and store the rest. Run the mower and string trimmer dry or add fuel stabilizer before storing them. Fuel that sits all winter is why they will not start in March.
13. Have dying or leaning trees evaluated
A tree that leans toward the house, has dead limbs, or shows fungus at the base is a winter liability. An arborist can tell you whether it needs removal, cabling, or nothing. Do this in fall, before the storms make the decision for you.
Phase 4: winterize the plumbing for the freeze (steps 14 to 18)
Puget Sound gets one or two arctic events a winter, usually a few days of temperatures in the teens or low 20s. Pipes that have never frozen in fifteen years freeze then, because nobody expected it.
14. Disconnect hoses and cover exterior faucets
The single most common freeze damage in this region. A hose left connected traps water in the spigot, the water freezes, and the pipe splits inside the wall. Disconnect every hose, drain it, and cover the hose bib with an insulated cap. Two dollars each.
15. Blow out the irrigation system
If you have in-ground sprinklers, have the lines blown out with compressed air before the first freeze. Water left in the lines and the backflow preventer freezes, splits fittings underground, and shows up as a wet spot in the lawn in April. An irrigation company does it in twenty minutes, and October is when they book up.
16. Insulate exposed pipes in the crawlspace and garage
Foam pipe sleeves on any water line in an unheated space. Pay attention to lines along exterior walls and near crawlspace vents.
17. Know where the main shutoff is
Before you need it. If a pipe bursts at 2:00 AM during a cold snap, the difference between a wet floor and a flooded house is whether you can find the valve in the dark. Find it now, test that it turns, and show everyone in the house.
During a forecast hard freeze, let the faucet farthest from the main drip overnight. Moving water resists freezing, and the water cost is trivial next to a burst line. A smart leak sensor under the water heater and a freeze sensor in the crawlspace, both under $50, will text you before the damage spreads.
18. Decide what to do about crawlspace vents
Closing foundation vents in winter reduces freeze risk to pipes but can trap moisture. In this climate, moisture is usually the larger problem. Most inspectors here recommend leaving vents open unless a hard freeze is forecast, then closing them temporarily. Ask a crawlspace specialist if yours has a history of either problem.
Phase 5: insulation, heating, and indoor air (steps 19 to 22)
19. Check attic insulation and ventilation
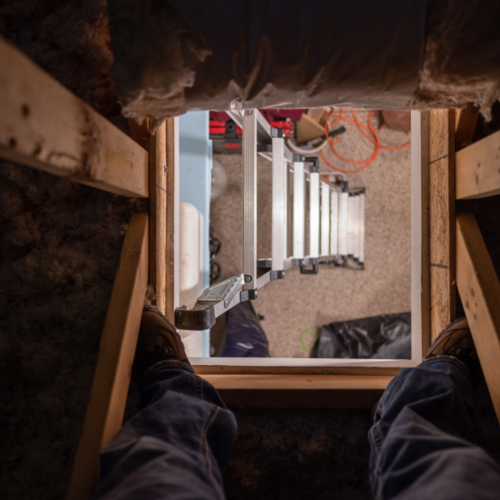
Open the attic hatch and look. Insulation should be even and deep enough that you cannot see the joists. Thin spots leak heat, and in this climate warm indoor air reaching a cold roof deck condenses and grows mold on the sheathing. Confirm soffit and ridge vents are clear, and that bathroom fans vent outside rather than into the attic. Your utility, whether Puget Sound Energy, Seattle City Light, or Snohomish PUD, runs home energy assessments and insulation rebates, and fall is when to ask.
20. Service the furnace or heat pump before you need it
Schedule a tune-up in September or October. HVAC companies book out in November when the first cold night reveals every furnace that was going to fail. Replace the filter now and set a reminder to replace it again in January.
Set the thermostat in the high 60s when you are home and a few degrees lower when you are out or asleep. If you have a heat pump, which most newer Puget Sound homes do, avoid large setbacks. Heat pumps recover slowly, and a big overnight drop can trigger the expensive backup strip heat in the morning.
21. Check the fireplace and chimney
If you burn wood, have the chimney inspected and swept before the first fire. Creosote buildup is a chimney fire waiting for a cold night. If you have a gas fireplace, confirm the pilot lights and the vent is clear. Note that Puget Sound Clean Air Agency burn bans are common on still winter days, so a wood stove is not a reliable backup heat plan.
22. Test smoke and carbon monoxide detectors
Heating season is when CO incidents happen. Test every detector, replace batteries, and replace any unit older than ten years. Washington requires CO alarms in homes, and a buyer's inspector will check for them anyway.
Phase 6: storm and outage readiness (steps 23 and 24)
23. Build the outage kit
Puget Sound windstorms take down power for hours in the city and days in the outlying areas. Flashlights, batteries, a charged power bank, water, a way to make coffee without electricity, and a plan for the refrigerator. If you are on a well, you have no water without power, which changes the math on a generator.
24. Decide on a generator, and if you have one, test it
A portable generator with a transfer switch or interlock, installed by an electrician, is the difference between an inconvenience and a lost freezer full of food. If you already own one, run it in September. A generator that sat untouched since last winter has stale fuel and a carburetor that may not cooperate when you need it.
How do you winterize a vacant house in Washington?
Differently, and more thoroughly, because nobody is there to notice the problem on the day it starts.
A vacant house is the situation sellers who have already moved, families managing an estate, and snowbirds all share. The 24 steps above still apply. Add these:
Decide between heat on and water off. The safest option in this climate is to leave the heat on at 55°F and let a trusted person check the house weekly. The alternative, shutting off the water at the main and draining the lines, protects against a burst pipe but requires opening every faucet, flushing toilets, and adding non-toxic antifreeze to traps. A plumber can do a full winterization in a couple of hours, and it is worth paying for on a house that will sit through January.
Keep the heat above 55°F if the water stays on. That is the number most insurers and plumbers use. Below it, pipes inside exterior walls are at risk during a cold snap even if the thermostat reads fine in the hallway.
Check your insurance. Many homeowners policies restrict coverage for a house left vacant beyond 30 to 60 days. Call your carrier before the house empties, not after a loss.
Have someone walk it weekly. A vacant house in the rain needs eyes on the gutters, the crawlspace access, and any ceiling stains. A property manager, a neighbor, or your listing agent. Water damage that runs for three weeks is a different repair than water damage caught in three days.
Leave the cabinet doors under sinks open on exterior walls, and leave interior doors open so heat circulates. Set the water heater to vacation mode. Shut the supply valves to the washing machine and dishwasher, since a failed hose on either is a common source of unnoticed flooding.
Make it look lived in. Interior lights on timers set to vary, mail forwarded, and a neighbor collecting anything left on the porch. Empty and prop open the refrigerator if it will be off. Close the fireplace damper so nothing moves in.
If the house is listed, your agent should be walking it before every showing anyway. Ask them to add the gutters and the thermostat to that walk.
How much does it cost to winterize a house?
Most of the list costs almost nothing. The few items that do are cheaper than the repair they prevent.
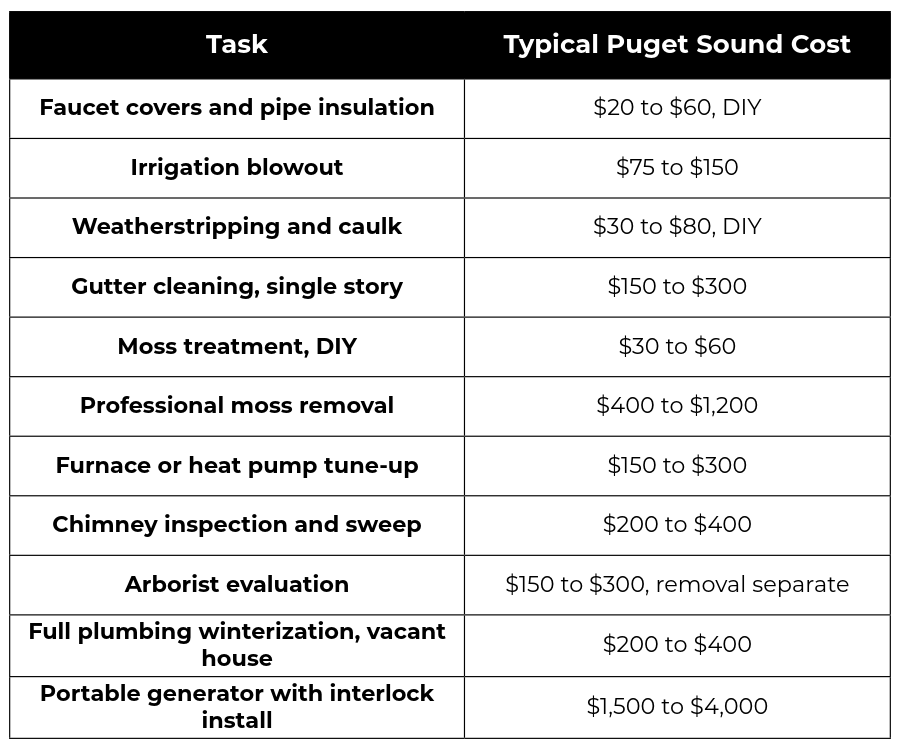
Figures are estimates for the Seattle area and vary by home size and contractor. Get two quotes on anything over a few hundred dollars. The whole occupied-home list, done yourself where possible and hired out where not, runs a few hundred to about $1,500 for most homes. A single burst pipe or a winter of water in the crawlspace costs more than that by an order of magnitude.
What to know if you are selling this winter
A winterized house shows better and inspects better, and the two things buyers notice most in a Puget Sound winter are water and warmth.
Do the drainage work first. A buyer touring in January walks through wet grass to reach the door. A puddle against the foundation or an overflowing gutter is the first thing they see and the first thing their inspector writes up.
Keep the house warm for showings. A cold, damp house reads as neglected even when it is not. Set the thermostat higher than you would for yourself.
Document what you did. Gutter cleaning, moss treatment, furnace service, chimney sweep. Put the receipts in the disclosure folder. A seller who hands over a maintenance record negotiates less after inspection, and our checklist for selling a house covers what else belongs in that folder.
If the list above surfaces bigger work, Every Door's Turnkey Services handle pre-sale repairs with nothing paid upfront, settled at closing.
What to know if you are buying this winter
Winter is the best time to inspect a Puget Sound house, because the house cannot hide what it does in the rain.
Tour on a wet day if you can. Look at the gutters while they are working. Check the crawlspace access for signs of water. Walk the yard and see where it pools. A home that looks fine in July can tell you everything in November.
Ask the seller for the maintenance history on the roof, the furnace, and the crawlspace, and read Form 17 with the drainage and moisture questions in mind. If you are considering waiving the inspection contingency to compete, a winter pre-inspection is the one that finds the most.
Frequently asked questions
When should you winterize your house in Washington?
September and early October, before the rain settles in. The outdoor work, especially moss treatment, caulking, and gutter cleaning, needs dry weather. Once the wet season starts in mid-October, exterior work gets harder and contractors book up.
Do you need to winterize pipes in Seattle?
Yes, though less than in colder climates. Disconnecting hoses and covering exterior faucets handles most of the risk. Full pipe insulation matters for lines in unheated crawlspaces and garages, and in the colder areas east of Lake Washington and toward the foothills.
How do you get rid of moss on a roof?
Apply a zinc or potassium-based moss treatment along the ridge in early fall and let the rain distribute it. For established moss, have a roofer remove it by hand or with a soft brush. Never pressure wash a composition roof.
What is the coldest you should let your house get in winter?
Keep the thermostat at 55°F or above, occupied or not. Below that, water lines inside exterior walls can freeze during a cold snap even when the house feels fine. If you want to go lower to save on heating, shut off and drain the water first.
What causes crawlspace moisture in Washington homes?
Poor grading, clogged or missing drainage, downspouts that discharge at the foundation, and a torn or missing vapor barrier. High groundwater in winter makes all of them worse. The fix is almost always outside the crawlspace, in the drainage, rather than inside it.
Getting ahead of the wet season
A Washington winter is not dramatic. It is long, wet, and patient, and it finds the one thing you skipped. The homeowners who get through it without a January surprise are the ones who spent a dry weekend in September on the gutters and the crawlspace.
At Every Door Real Estate, we walk sellers through what buyers will look for in a winter showing, and we help buyers read a house in the rain. If you are listing or looking this season, talk with our team.
Check out this article next